
Introduction
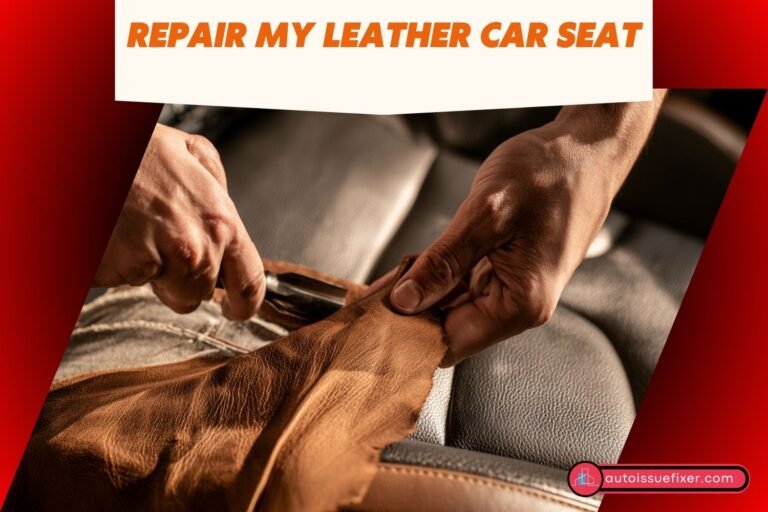
How to repair rip in leather car seat depends on the tear’s size, location, and the condition of the surrounding upholstery. Small slits can often be repaired with a leather repair kit, while larger or heavily shredded areas may require professional upholstery services. DIY repair kits typically cost around $25 to $45, mobile upholstery specialists may charge $150 to $300 per tear, and complete seat reupholstery can cost $600 to $1,500 or more per seat. Before starting, clean the damaged area and inspect the tear to determine whether the leather can be repaired without replacing the entire panel. For suitable tears, inserting a backing patch beneath the leather helps support the damaged area and prevent further splitting.
Flexible leather filler can then smooth small gaps before color-matched repair compounds restore a more consistent appearance. Matching the original leather color and grain pattern helps the repaired area blend with the surrounding upholstery. Avoid excessive heat or harsh cleaning products that could cause additional damage. Comparing DIY solutions with professional repairs helps you select the most practical option for your budget and the extent of the damage. With timely attention and regular leather conditioning, you can help preserve your car’s interior comfort, appearance, and resale value.
Comprehensive Breakdown of Assessing Leather Rip Severity
Before buying materials, evaluate the extent of the rip across your seat to determine the correct restoration approach:
Surface Scratch Rip: A shallow split in the top finish coat that does not penetrate through the full hide thickness.
Clean Linear Slit: A sharp rip through the leather exposing inner foam, with edges still perfectly aligned and straight.
Jagged / Shredded Rip: A ragged tear with stretched or missing hide material, requiring careful sub-patch reinforcement.
Bolster Edge Friction Tear: Continuous cracking and tearing along high-stress seat edges caused by constant passenger sliding entry and exit.
Risk Level: Service Soon. Mending leather rips immediately prevents passenger friction from turning a narrow slit into a major upholstery failure.
Master Cost Matrix: Leather Rip Repair and Upholstery Prices in the USA
To help you benchmark quotes from mobile interior specialists and professional upholstery shops against DIY expenses, the following table outlines national average costs across standard U.S. leather seat repair categories:
| Repair Approach / Service Scope | Estimated U.S. Cost Range | Time Investment & Labor Details |
| DIY Leather Rip Repair Kit | $25 – $45 total | 2 to 3 hours of active DIY labor |
| Mobile Interior Upholstery Specialist | $150 – $300 per rip | 2 to 3 hours onsite professional service |
| Professional Upholstery Shop (Full Recover) | $600 – $1,500+ per seat | 1 to 2 days professional shop turnaround |
| Leather Conditioner & UV Protectant Set | $12 – $20 | 30-minute quarterly maintenance application |
Key Factors That Influence Leather Seat Repair Pricing in the U.S.
Several structural elements dictate the final bottom line on your seat upholstery repair quote across different regions and service providers:
Size and Length of the Tear: A small two-inch slit requires minimal adhesive and filler compound, whereas large ragged tears demand extensive canvas backing and multi-layer patching.
Seat Location and Stress Level: Rips located directly on high-friction seat cushions experience constant body weight flexing, requiring high-tensile adhesives and durable flexible fillers.
DIY Versus Professional Labor: Purchasing a $35 DIY kit keeps out-of-pocket expenses minimal, whereas hiring mobile interior craftsmen involves dedicated hourly service charges.
Leather Quality and Dye Matching: Premium full-grain leather or rare interior color schemes require advanced pigment mixing to achieve an invisible color blend.
Safety Assessment and Preparation
Classifying your leather seat repair need and following proper safety protocols ensures a successful project:
Monitor: Superficial finish cracks or minor scuffs that do not compromise the underlying hide structure.
Service Soon: Clean linear slits or small rips where edges can be easily aligned with a sub-patch.
Urgent Repair: Large shredded tears with exposed foam and missing material that risk rapid expansion.
Safety Precautions: Work in a well-ventilated area when using chemical leather adhesives and solvents. Exercise caution when handling heated household irons during grain texturing steps.
Required Tools and Equipment for DIY Leather Seat Repair
Gather these essential consumer supplies available at any U.S. auto parts retailer, craft store, or online specialty supplier:
| Tool or Material Item | Primary Purpose | Estimated U.S. Price |
| Leather Repair Kit (Sub-Patch, Adhesive, Filler, Pigment) | Providing structural backing and surface color matching for rips | $20 – $35 |
| Isopropyl Alcohol (91%) & Clean Rag | Deep cleaning and stripping body oils from leather rip edges | $4 – $8 |
| Fine Tweezers & Micro-Spatula | Inserting backing cloth smoothly and spreading filler paste over seams | $6 – $12 |
| Grain Texturing Paper & Heat Source (Iron) | Imprinting realistic leather grain texture into wet filler compound | Included in kit |
| Leather Conditioner & UV Protector | Restoring natural suppleness and protecting restored hide | $12 – $20 |
Step-by-Step Guide: How to Repair a Rip in a Leather Car Seat at Home
Achieving a seamless, professional leather repair requires structural sub-patching, careful compounding, texturing, and conditioning. Follow this structured procedure:
Step 1: Thorough Cleaning and Prep: Wipe down the ripped leather area thoroughly using a clean microfiber cloth dampened with 91% isopropyl alcohol. This strips away embedded body oils and dirt around the edges, ensuring that interior adhesives bond securely to the leather underside.
Step 2: Insert a Reinforcing Sub-Patch: Cut a piece of canvas or mesh sub-patch slightly larger than the length of the rip. Using tweezers, carefully slip the patch through the opening and flatten it directly underneath the leather hide. Apply a thin layer of leather adhesive under each side of the rip to glue the hide securely to the sub-patch, holding the edges flat together until set.
Step 3: Apply Leather Filler Compound: Once the sub-patch has bonded and closed the rip, mix your leather repair compound to match your seat’s exact color. Using a micro-spatula, press the flexible filler paste lightly into the remaining seam line so it sits flush with the surrounding surface. Allow it to air-dry for 20 minutes.
Step 4: Imprinting Grain Texture and Coloring: Place the grain texturing paper (provided in repair kits) directly over the semi-dried filler compound. Press a warm household iron (set to low heat with no steam) gently over the paper for 10 to 15 seconds to thermally transfer the pebble grain pattern. Peel away the paper carefully.
Step 5: Conditioning and Protection: Allow the repair to cure for 24 hours before sitting on the seat. Apply a high-quality leather conditioner across the entire seat to restore natural moisture balance and UV protection.
Regional U.S. Climate Considerations for Leather Interior Maintenance
Environmental factors across different geographic regions of the United States directly impact leather hide moisture levels and durability:
Sunbelt Region (Arizona, Texas, Florida): Intense UV rays through windshields dry out leather hides rapidly, causing rip edges to curl and pull apart. Using windshield sunshades and quarterly conditioning is mandatory.
Northern Winter States: Sub-zero temperatures make leather stiff and brittle; sliding into a freezing car seat increases the risk of widening existing rips.
Frequently Asked Questions
1. What are the best methods for selecting and evaluating how to repair rip in leather car seat projects?
The most effective approach involves assessing the structural size and placement of the tear, such as determining whether a split seam requires heavy-duty stitching with a curved upholstery needle, or if an open surface tear in the leather hide demands a sub-patch backing reinforcement combined with flexible liquid leather filler to bridge the gap.
2. How can I make analyzing how to repair rip in leather car seat procedures reliable and vehicle-compatible?
Ensure you cross-reference your repair materials, backing fabric, and colorants with your car’s exact interior trim color code and leather grain texture, keeping in mind that modern seats often integrate side-impact airbag deployment seams and electronic heating elements that must never be pierced or obstructed by incorrect patching or heavy stitching.
3. How can I handle budgeting when preparing for a how to repair rip in leather car seat project on a strict budget?
Start by tackling minor tears and split seams yourself using a DIY automotive leather repair kit ($25 to $60) containing sub-patches, adhesive, and color-matching compounds, while reserving professional upholstery shop services ($200 to $600+) for major panel replacements or structural foam rebuilding on heavily degraded seats.
4. What tools and equipment are essential for monitoring wear and executing how to repair rip in leather car seat procedures?
Essential supplies include high-resolution close-up photos of the rip for color matching, heavy-duty curved upholstery needles and bonded nylon thread (if repairing split seams), a sub-patch reinforcement fabric, flexible leather repair adhesive and filler compound, a digital vehicle management logbook, and an organized folder for product instructions.
5. How can I protect your car’s leather upholstery and newly repaired seats from premature tearing and environmental wear?
Shield your leather seats from drying out, UV fading, and recurring splitting by applying a high-quality UV-blocking leather conditioner every three to six months, avoiding sharp objects, keys, or metal-studded clothing in the cabin, using fitted seat covers during heavy daily use, and parking in shaded areas or utilizing a quality fitted windshield sunshade to block intense cabin heat.
Final Takeaway
Mastering the technical steps of how to repair rip in leather car seat damage empowers you to restore your vehicle’s cabin luxury and prevent minor tears from turning into expensive upholstery replacements. Repairing a rip in a leather car seat yourself is a highly satisfying, budget-friendly weekend project that prevents minor accidental damage from turning into major upholstery replacement. By securing a strong sub-patch underneath, filling the seam cleanly, and texturing with grain paper, you can restore your leather seats to pristine condition.